
» Getting Started
A basic guide to wire wrapping tools.
I’ve had a few friends ask for tips on getting started wire wrapping so I’m making a quick post.
Tools:
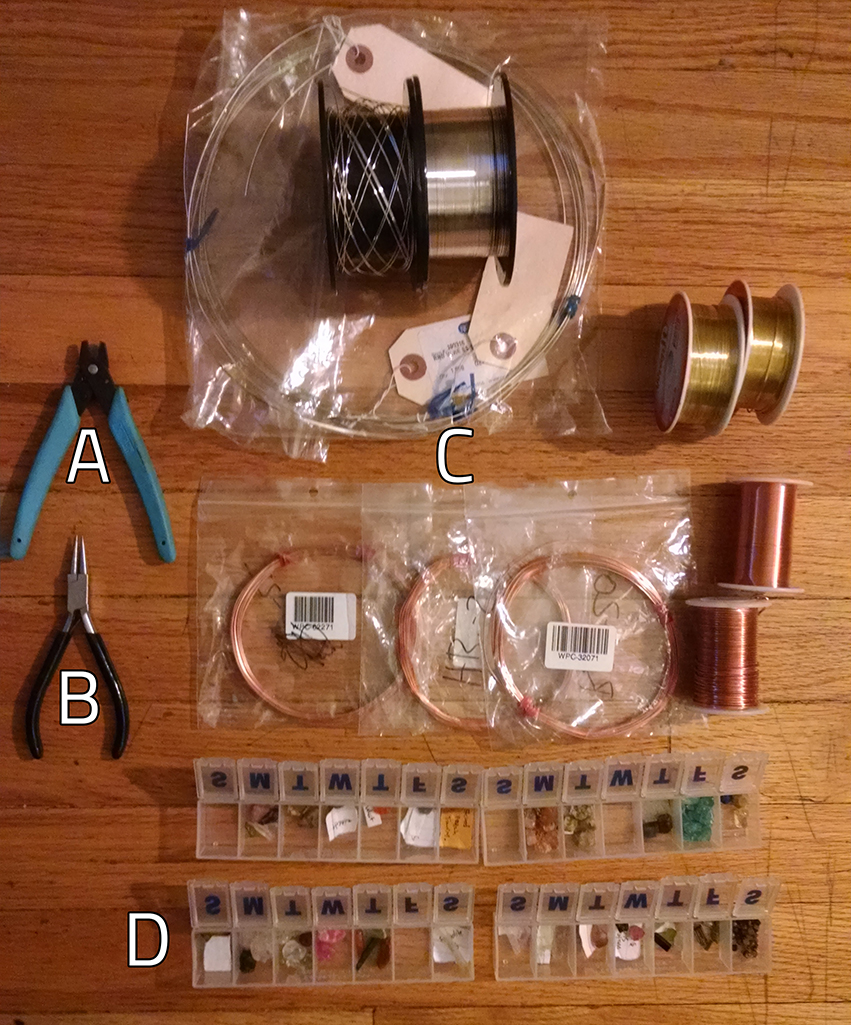
A- Flush Cut Snippamajigger
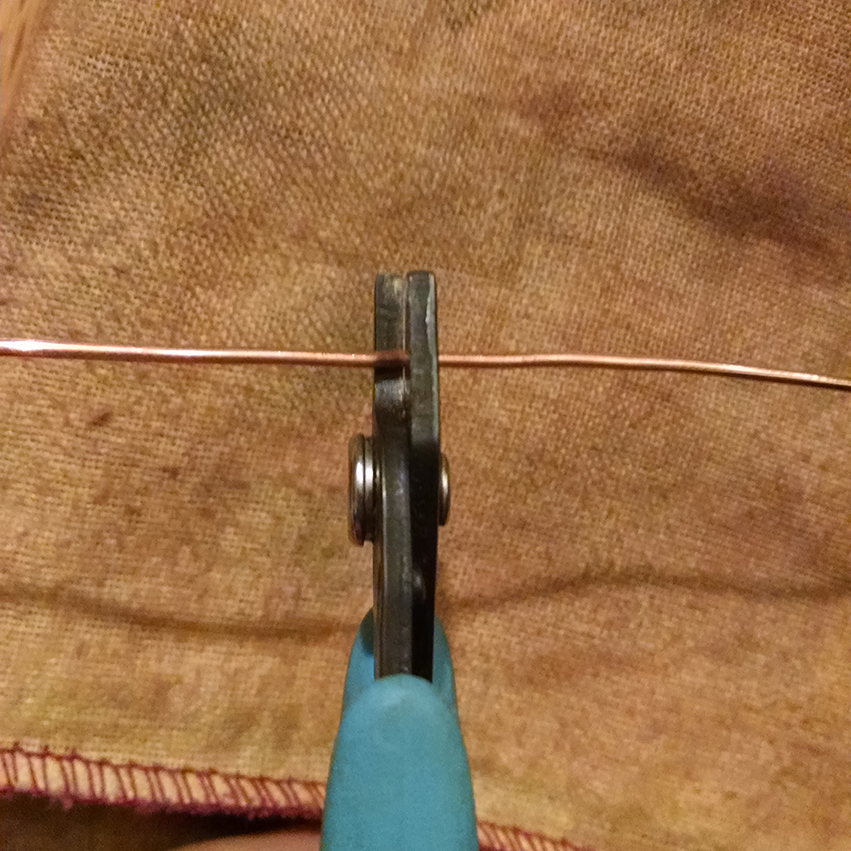
These Bad boys cut metal, but not just any pinchers will do. You want to be sure that it cuts flush, otherwise all your wire ends will be sharp little hypodermic needles and you’re gonna have a bad time. Look more closely:
See how those are super flat and using a scissor motion instead of pinching? Well you’d better be able to see that otherwise your eyes are junk and you’re ill suited for this art. Just kidding, you can do whatever you want, I believe in you. If you click the Image it will get bigger for your bunk eyeballs.
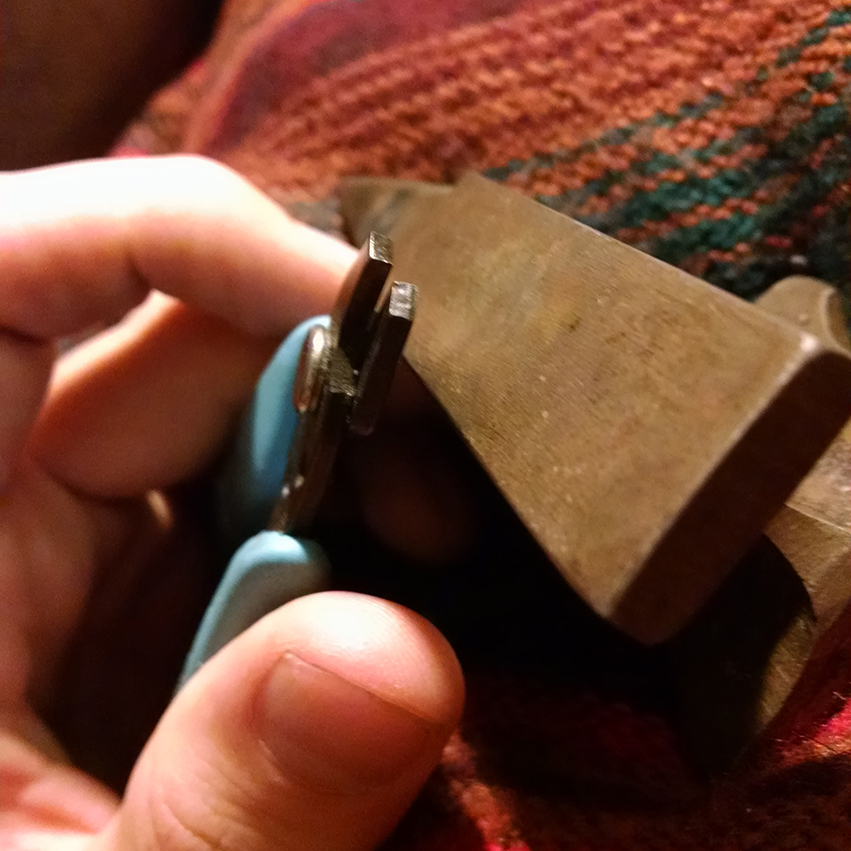
Here look, this is another image of a snippamajigger (Technical Term) ready to nom on a piece of metal:
The wire is visibly scared! Crystals have feelings, so be nice. Also, metal is a type of crystal, so that’s a cool thing.
B – Rosary Pliers
I think these are called rosary pliers, they are tiny little guys with round tips. I like to think of these as my metallic fingers, they help you bend wire in ways that would shatter your puny human bones:
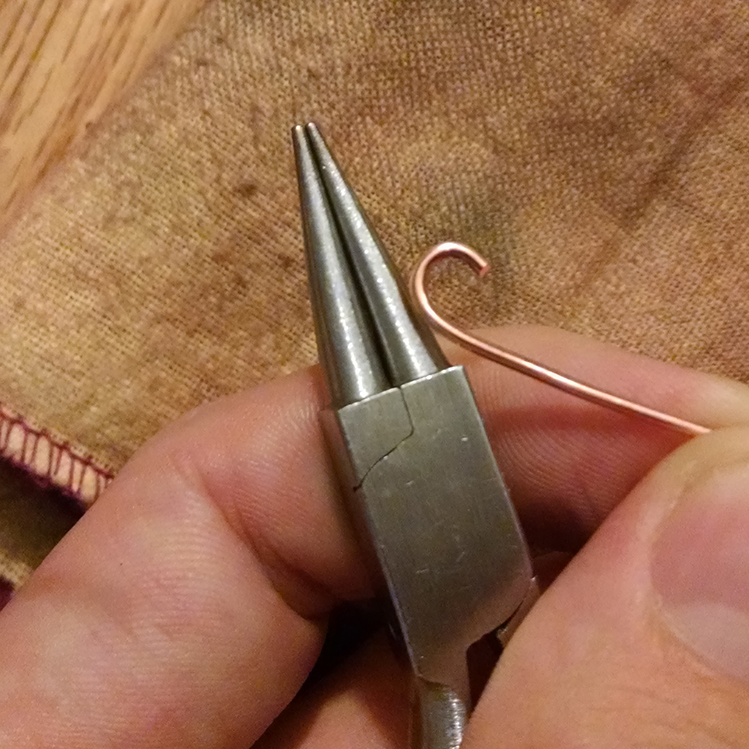
Wire has memory. Every time you bend or tweak or twist, it remembers. More specifically, every time you use hard metal tools to shape the metal it leaves newbie tool marks(they are ugly but can be buffed out if they aren’t too deep). Take it easy and only use your hard tools when necessary. Your squishy human fingers can do incredible things on their own.
C – Wire
There is a lot to say about wire to I’ll segment it.
Metal:
When you’re learning it’s ok to buy cheap wire at a hobby store or what have you, but when you’re ready to make something you want to wear you should be more particular. Most of the metal you get at a hobby store is nasty plated stuff and it rubs off with too much skin contact or polishing, leaving the piece looking ghetto and your body feeling poisoned. Try to use pure metals/alloys, here’s what I suggest:
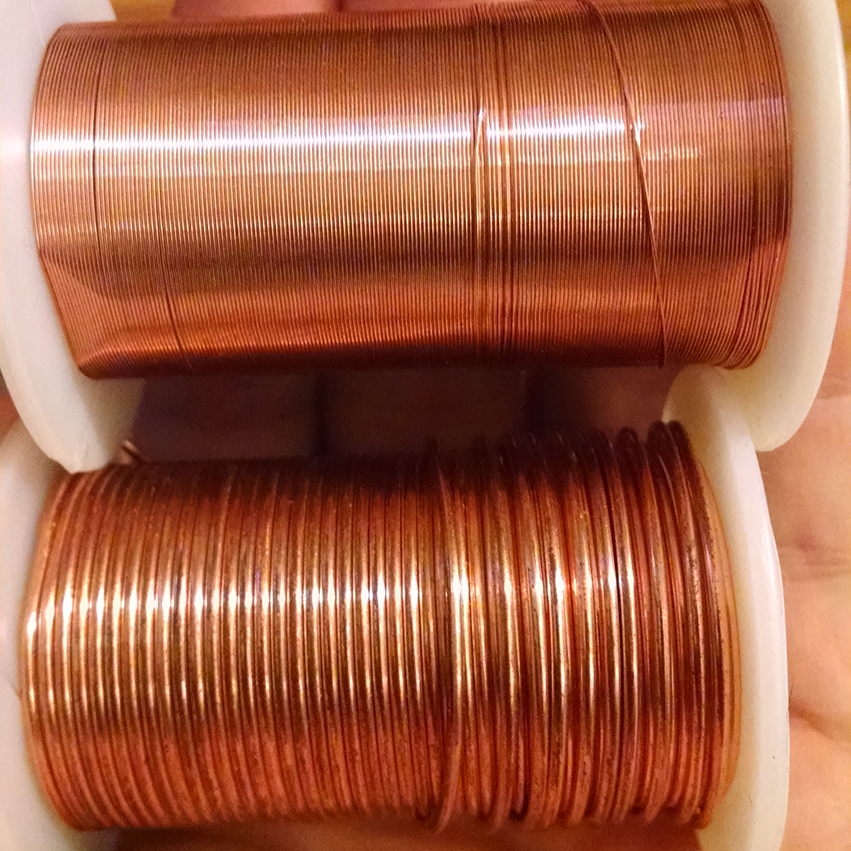
Copper – Copper is cheap and can make some very nice looking pieces. The big downside is that its firey and aggressive, making some people itch.
Brass – Brass is goldish and is an alloy of something and something else… Probably copper and zinc or something, I dont care enough to look it up, but brass is gentler than copper unless you’re allergic to most metals anyway. Brass and bronze are pretty much the same thing, and both are just a bit mroe expensive than copper, but still cheap.
Silver – You want to be a bit more baller? Buy up some 925 homie. Pure silver (.999 percent) is softer and a bit brighter than sterling silver(.925 percent) but both are very nice. Silver is something like 10x more expensive than copper by weight however so unless you just dont give any fucks, I’d suggest getting some experience before wasting silver, or don’t, I don’t even care.
Gold – Don’t use gold if you’re a newbie, it seems really wasteful and disrespectful.
Titanium – This stuff is cray cray expensive but looks all grey and cool, its not too reflective.
Gauge:
Gauge means size, Smaller is bigger and bigger is smaller.
30 gauge – is tiny tiny and great for coiling, 28 gauge is also ok for this
20 gauge – I like this as a middle ground
16 gauge – A nice larger size that will hold shape well when weaved up ons.
And everything in between
Shape:
There are a lot of cool shapes of metal, they all look cool in different ways:
Round
Half Round
Square
Triangle
Low Dome
Twisted
D – Gemstones
See How I’ve got them in pill cases? I stole that idea from someone else.
———————————Things you don’t really need but whatever:————————————
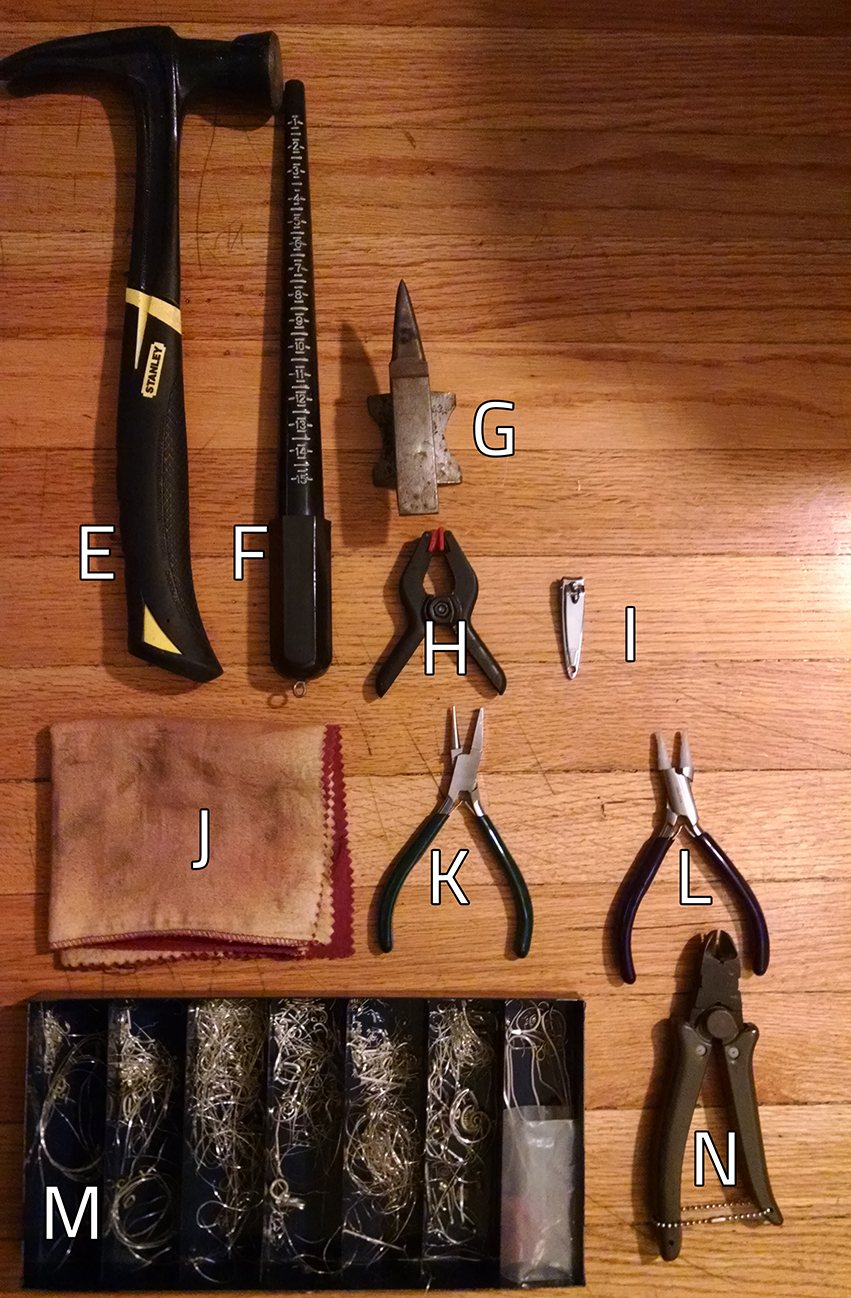
E – Hammer
You don’t need a hammer, I have it listed because sometimes I flatten wire. some people use plastic or wood or leather hammers to straighten their wire but I just use my fingers to straighten it.
F – Mandrel
Mandrels are tapered rods which you can measure rings upon. Its pretty much only useful if you’re going to make rings.
G – Tiny Anvil
You don’t need this either its fun to use for flattening or looking sharp
H – Plastic wood clip thing
Sometimes when you’re weaving a few wires to one another you may want to be able to hold it in place easier. Use a little clamp thing like this to get a better grip on things. It may help.
I – Nail Clippers
I hear tell that if you don’t have a good set of flush cutters you can use nail clippers to cut wire. I’ll bet it works.
J – Polishing Cloth
You rub it on metal to make it shiny, Sometimes they have the polish on a connected cloth for fast action.
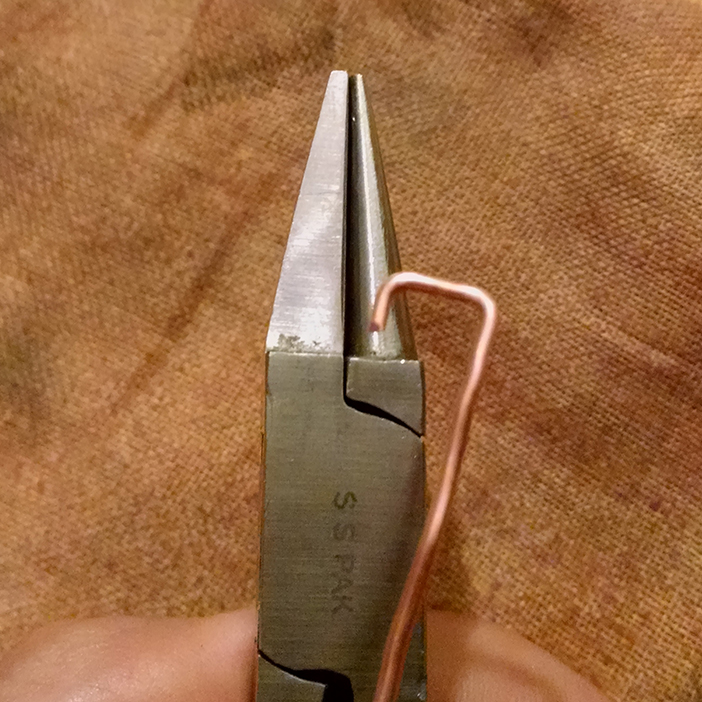
K – Square Nosed Jewelry Pliers
Sometimes I like to make a hard 90 degree angle but those round rosary pliers are to genteel to handle it. That’s why I like having a pair of these around. Some people may say, “Nick, the pictured tool also has a round side, how brilliant!”. I agree with you but you still need rosary pliers because that fat flat head cant do the subtle tiny pinching you may need:
L – Plastic Tipped Rosary Pliers
These are great for keeping your metal tool mark free, but are more slippery and harder to pinch with. Over time they become all junked up. You can buy replacement tips though, so rock on!
M – Scrap Box
You need to have a good place to put all your scrap pieces of metal. You’ll be able to reclaim and reuse a lot of wire that seemed worthless at one point and it keeps things clean. Also, with more expensive metals you can melt down or resell your scraps, saving your precious cash over time.
N – Heavy Duty Clippers
These mean things are some kind of hi-tech monster snippers. I use them for cutting things with a really heavy gauge or irregular shape. Also just a luxury.